Configure your Win7 laptop as a NAT
- Connect your laptop to the campus network via WiFi.
- On the laptop, run Control Panel - Network and Sharing Center
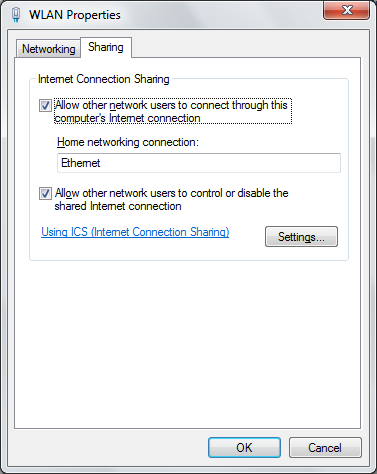
- Right click the interface of WLAN. Choose Property - Sharing.
- Check "Allow other network users to connect through this
computer's Internet connection."
- Choose "Ethernet" as the "Home Networking Connection".
Client
- Connect your PC to your laptop via Ethernet.
- Now the connecting PC will receive an IPv4 address such as
192.168.137.100, and can browser the Internet using the public IPv4 of
your laptop.
Visit http://www.ipv6.org.tw/ to verify this.
- Visit
HiNet IPv6 Tunnel Broker to download gogoCLIENT. Follow the
instruction to install it.
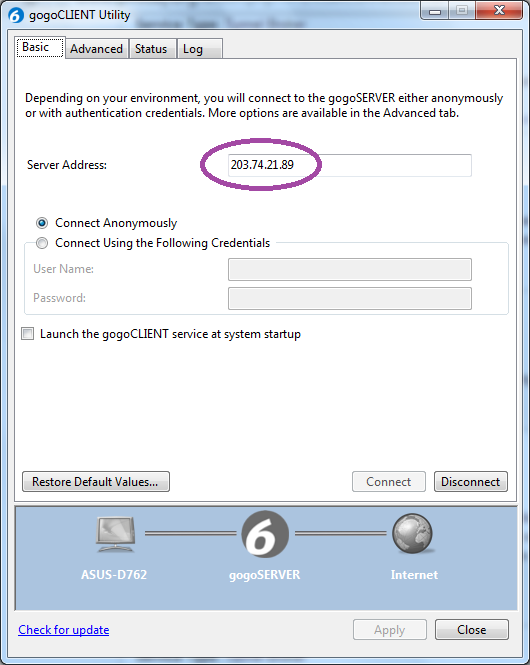
- The default server is "anonymous.freenet6.net". Change it to
"203.74.21.89". Press Apply and Connect. Now your client has IPv6
connection.
- Verify by "ping -6 www.kame.net".
- Accessing "www.ipv6.org.tw" or "www.kame.net" may indicate that
you are still connecting via IPv4, because in Windows tunneled
interfaces are less preferred.
- Specifying the URL http://[2001:c50:ffff:1:21a:92ff:fe43:d665]/
allows your browser to access via IPv6.
- Capture the tunnel packets with Wireshark. A capture filter such
as "host 203.74.21.89" or "udp port 3653" would be useful.
- You may wish to read RFC 5572 to know more about Tunnel Setup Protocol (TSP).
Providing IPv6 for Your Home Network
- After a client is connected to IPv6 according to the above
procedure, you may wonder whether it is necessary for you to install a
gogoCLIENT for every device in your home network.
- This will be a tedious. Some devices (such as IP phones) will not
even allow you to install gogoCLIENT, so what can you do?
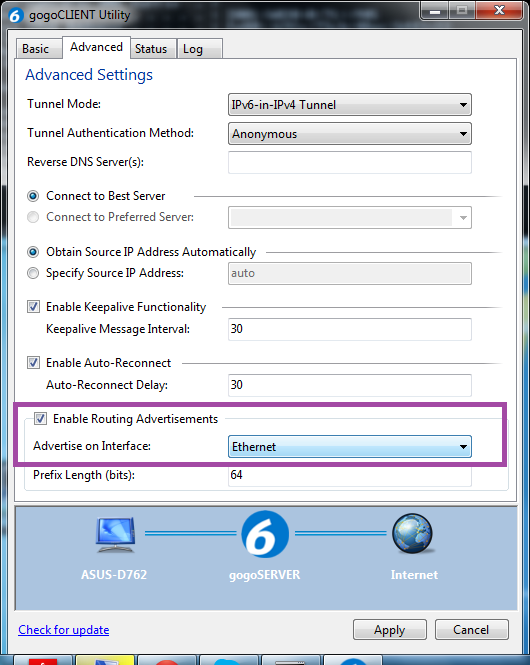
- In the "Advanced" tab of gogoCLIENT, choose "Enable Routing
Advertisements".
- Reference:
SAMS class Project 13: Router Advertisements